Brightspace/D2L BioSig-ID Admin App
Getting Started
Quiz Intercepts (Guarded Quizzes)
The first page that you will see is Quiz Intercepts. Place a check mark next to all quizzes that you would like to guard. All link
items will show in the list including quizzes. Quizzes that are not
already intercepted will have a box next to where you can select it to
be intercepted.
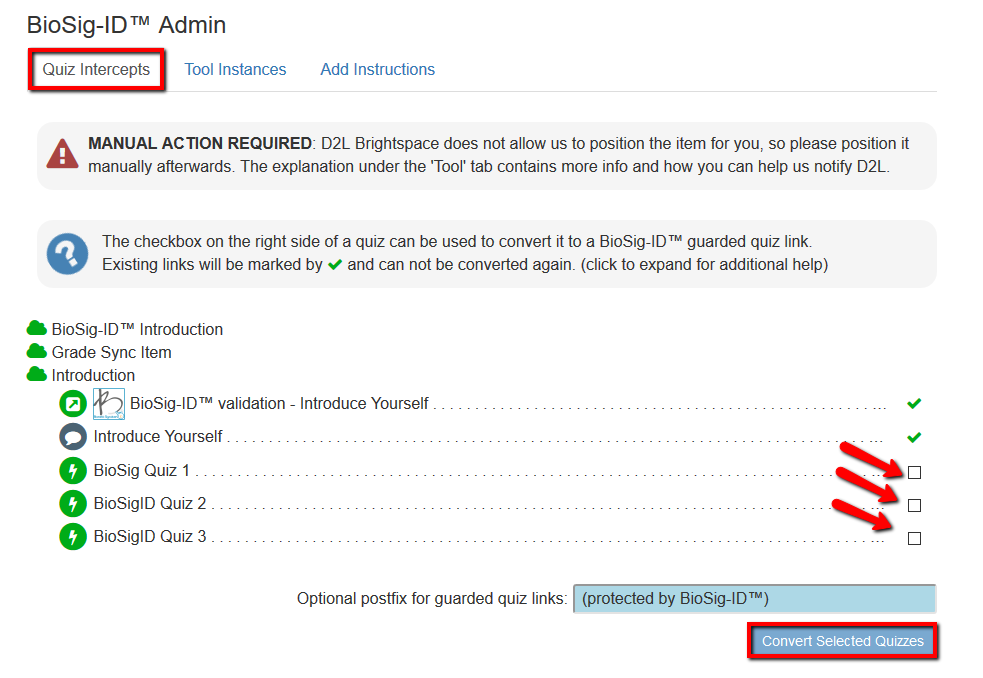
Next, you will select the options you would like to apply to the Quiz Intercepts.
Hide Quizzes from Navigation Menu
The course navigation menu “Quizzes” will be automatically hidden from view to prevent direct access to a quiz.
Open BioSig-ID™ instances in a new tab
Force all newly created BioSig-ID™ instances to open in a new tab.
This is not required as it integrates well within Brightspace, but it helps
when dealing with mainly small resolution devices.
Optional post-fix for guarded quiz links
By default, this box contains (protected by BioSig-ID™). This wording
will appear in the module next to the quiz. If you prefer to not let
students know in advance that an exam is gated, you can remove this
wording in each course. Alternatively, if your institution would like to
customize this wording or to never include this wording please reach
out to the BioSig-ID™ team for customization.
Click on the Convert the Selected quizzes to BioSig-ID™ guarded quiz link.
When this is completed you will receive a notification.
Click the Close button to continue.
Once a quiz has been converted it will now appear in the Modules as:

Tool Instances
Click on the Tool Instance tab.
Add BioSig-ID™ instances wherever you would like a user to verify their identity.
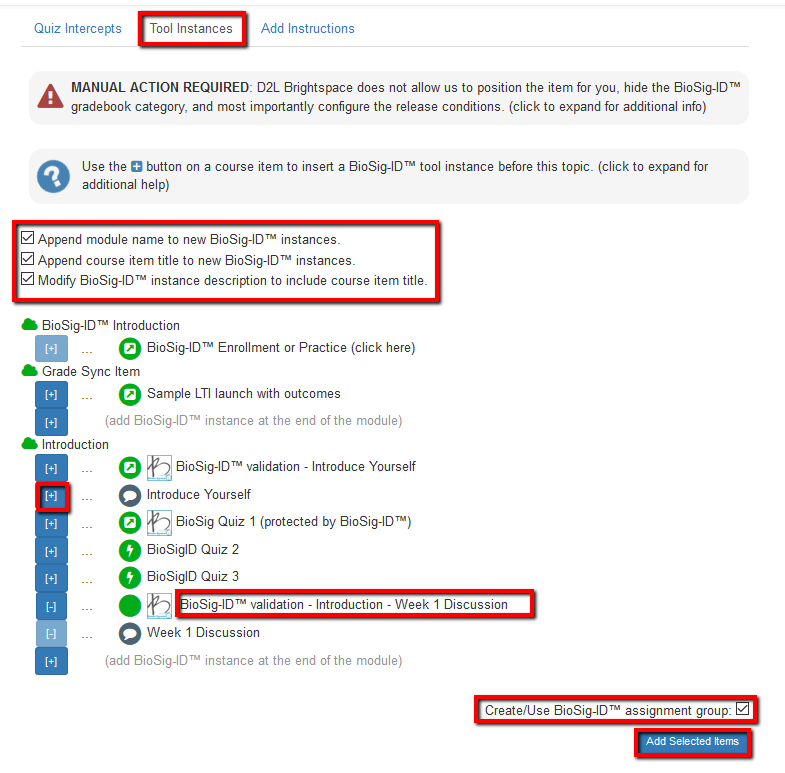
- Appending the module name to the BioSig-ID would add for example: BioSig-ID validation-"Module Name"
- Appending the course item title would add for example: BioSig-ID validation-"Course Item Name"
- Selecting both items will add the Module Name & Course Item name to the title of the verification for example: BioSig-ID validation-Module Name-Course Item Name
- Modify the BioSig-ID instance description to include the course item title name. As an example: Please validate your BioSig-ID™ profile to make "Module Name or Course Item name" available
Create/Use BioSig-ID™ assignment group this keeps all the BioSig-ID™ tool instances together in a group inside the “Assignments”
Click on the Add Selected Items button 
When completed, you will receive a notification. Click Close to continue.
Add Instructions
At this time, D2L will not support adding the instructions at the desired location. After you create the instructions you will drag-and-drop the instructions where you would like them to appear.
Click any one of the items in the Table of Contents. and then click Add the BioSig-ID enrollment instructions before the selected module.
Click on the Add the selected BioSig-ID™ enrollment instructions before the selected module . Click Close on the notification.
In the Table of Contents, drag the BioSig-ID item to the top. Click on the BioSig-ID content item to view the instructions.
**Please reach out to your BioSig-ID™ team if you would like to customize the BioSig-ID™ Introduction page.
BioSig-ID & The Gradebook
BioSig-ID will show up in the gradebook, however, these items can be hidden from student view.
For grades that are not weighted:
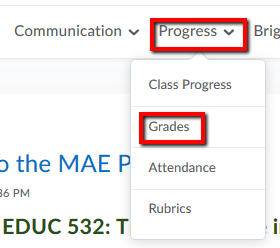
In the course, click on Progress from the dropdown list choose “Grades”
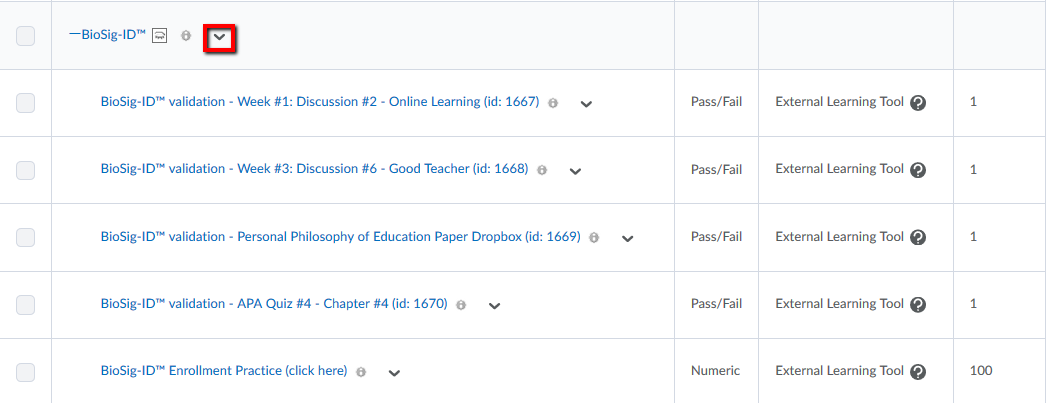
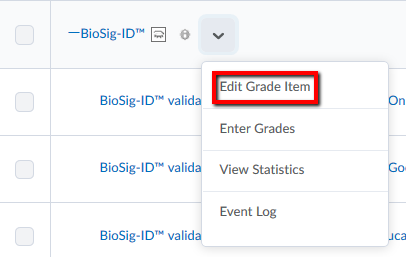
In the gradebook look for the BioSig-ID™ category. Click on the chevron next to the category title.
From the dropdown menu choose Edit Grade Item.
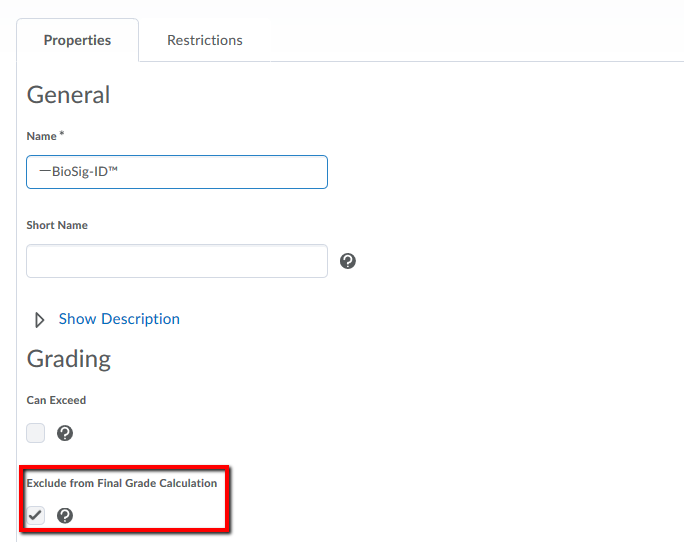
From the Properties tab, note that the checkbox for Exclude from Final Grade Calculation is checked.
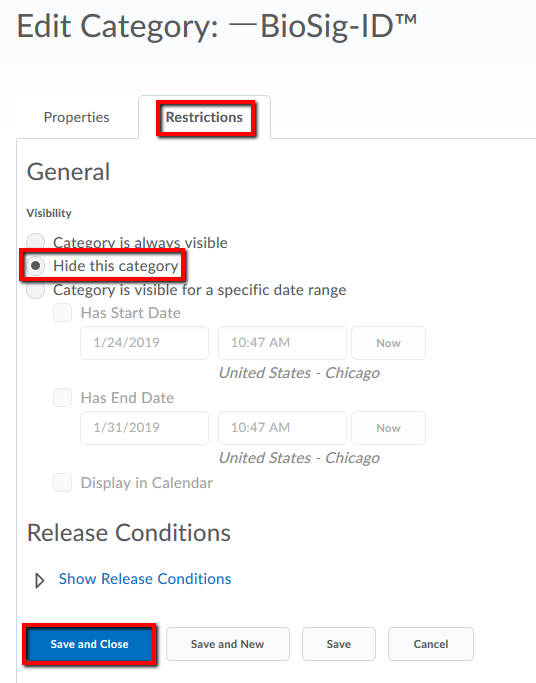
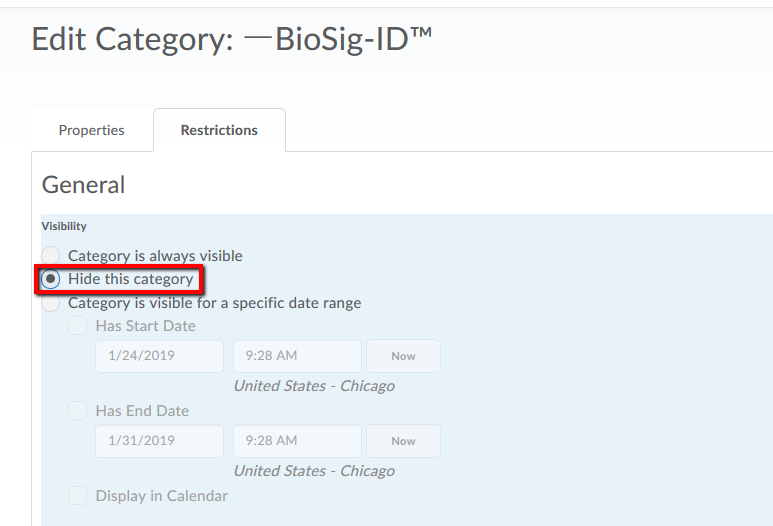
Click on Restrictions at the top of the page
Under Visibility, click Hide this category
Click on Save and Close
For weighted grades:
In the course, click on Progress from the dropdown list choose “Grades”

In the gradebook look for the BioSig-ID™ category. Click on the chevron next to the category title.

From the dropdown menu choose Edit Grade Item.

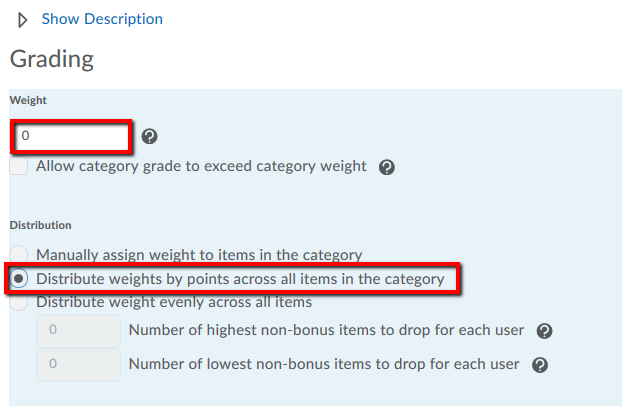
Under Weight, set the category weight to "0".
Under Distribution, set to Distribute weights by points across all items in the category
Click on Restrictions at the top of the page
Under Visibility, click Hide this category
Click on Save and Close

Related Articles
Canvas BioSig-ID Admin App
Getting Started Click on BioSig-ID™ Admin tool in the Course Navigation menu. Click Authorize to allow BioSig-ID™ access to your course. This is a one time action. BioSig-ID Admin App Location If the Admin App is not available, please contact your ...BioSight-ID™ for Brightspace
The only way to make BioSight-ID™ functional within a Brightspace LMS environment is through a browser extension. We currently offer a solution for the Chrome, Edge, and Firefox browsers for desktop usage. Detection is done fully automatic, and if ...Brightspace/D2L Installation
Introduction Brightspace courses can be manually configured to rely on BioSig-ID™ tool-instances or quiz-intercepts in adding student identification. The BioSig-ID™ Admin App for Brightspace adds an even easier method via REST-API calls to automate ...BioSig-ID™ Dashboard Usage - README.FIRST
Reports are now merged within the BioSig-ID™ Dashboard. Please update all your bookmarks and references accordingly. Any reference to https://verifyexpress.com/reports/<account-name>/admin or /public is no longer valid. The BioSig-ID™ Dashboard can ...Adding BioSig-ID to Moodle Courses
Introduction Instructors create an instance of the module in their course and use its associated grade book column to give students access to one or more other content items (such as an assignment). Creating a Tool instance Add a tool instance of the ...